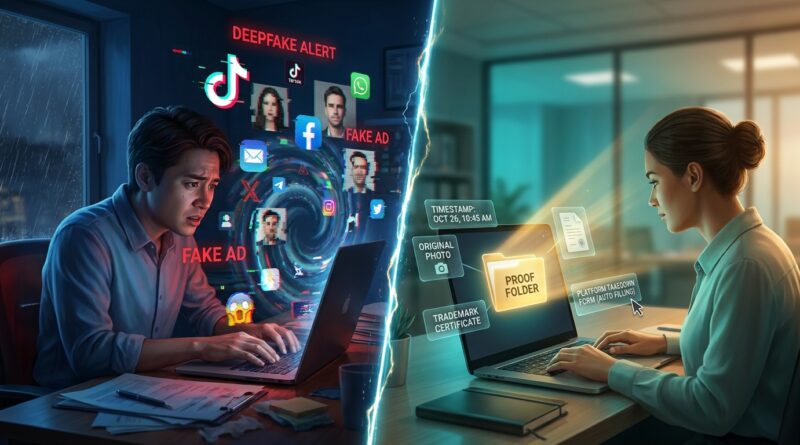
New Deepfake Takedown Rules Quietly Turn Your Brand Videos Into Legal Evidence: How To Build a ‘Proof Folder’ Before The Next Viral Fake Hits
You do not think about deepfakes until one steals your face, your logo, or your product demo and starts selling nonsense to your own customers. Then the panic hits fast. People message you. Orders get disputed. Trust starts leaking out by the hour. What makes this extra frustrating is that the new federal deepfake takedown rules sound like they are only about intimate images. But the systems platforms are building around those rules are already changing how impersonation reports, fake ads, and scam videos get reviewed. For brands and creators, that means one simple thing. If you can prove what is real, who owns it, and when it was published, you have a much better shot at getting a fast takedown. If you cannot, you are just another support ticket in a very long line. The smartest move now is to build a simple “proof folder” before anything goes wrong.
⚡ In a Hurry? Key Takeaways
- A deepfake takedown for brands goes faster when you already have a proof folder with original files, publishing dates, account ownership records, and trademark or business details.
- Start now by saving source videos, screenshots, ad IDs, URLs, timestamps, and a one-page ownership sheet in one cloud folder your team can reach.
- This is not just about legal cleanup. It can reduce scam losses, customer confusion, and the time wasted trying to prove you are the real account.
Why this suddenly matters to small brands
Most small businesses still treat fake content like a PR problem. It is now closer to an evidence problem.
Platforms are under pressure to respond faster to synthetic media, impersonation, and non-consensual fake content. Even when a new rule is aimed at one category, the reporting systems behind it often spill into related areas. That includes fake celebrity ads, cloned voice promos, fake founder videos, and product clips edited to look official.
If someone posts a scam ad using your skincare demo, your founder’s voice, or your logo on a fake giveaway, the first question is no longer just “is this harmful?” It is often “can the complainant quickly prove ownership, origin, and misuse?”
That is why a deepfake takedown for brands is becoming less about outrage and more about paperwork.
What a “proof folder” actually is
Think of it as your emergency binder, but digital.
Your proof folder is one organized place that holds the files and facts a platform, ad network, marketplace, or lawyer may ask for when fake content appears. It should be boring. Clear. Easy to send. Easy for a reviewer to understand in two minutes.
The goal
You are trying to prove four things quickly:
- This is our real brand, person, or product.
- This is the original content or asset.
- This is where and when we published it first.
- This fake account, ad, or video is using it without permission and may be causing harm.
What to put in your proof folder
1. Original source files
Keep the earliest version you have of every important brand video, ad creative, founder clip, voiceover, product demo, and logo file.
- Raw video files
- Original exports
- Project files, if available
- High-resolution logos
- Original product photos
Do not rely only on what is posted on Instagram, TikTok, or YouTube. Download and store your own master copies.
2. Proof of first publication
You want records that show when your real content went live.
- Website URLs
- YouTube upload dates
- Social post links
- Ad launch dates
- Email campaign archives
A simple PDF or screenshot timeline helps. Date matters when you are trying to show that the fake came later.
3. Brand ownership documents
This is the part many creators skip until it hurts.
- Trademark registration, if you have one
- Business registration
- Domain ownership records
- Links to official social accounts
- Press kit or official bio page
If your product photos and listing images are part of your evidence chain, it also helps to label them clearly. That is where New EU AI Transparency Rules Quietly Turn Your Product Photos Into Evidence Files: How To Label Content So Platforms Stop Guessing For You is worth reading. The same habit of labeling and documenting content can make your takedown requests stronger.
4. A one-page identity sheet
Create one PDF that says:
- Brand name
- Legal entity name
- Main website
- Official social handles
- Primary contact email
- Trademark numbers, if any
- Short description of your products or services
This saves time when a platform asks you to verify who you are.
5. Evidence of the fake itself
When something goes wrong, collect the fake before it disappears.
- Screenshots
- Screen recordings
- URLs
- Account names and IDs
- Ad library links
- Marketplace seller names
- Timestamps and dates found
Save the full page if you can, not just the cropped scary part. Reviewers need context.
6. Harm evidence
This one is often the difference between “we will review this” and “we have escalated this.”
- Customer complaints
- Chargebacks
- Messages from confused buyers
- Comments showing people believed the fake
- Sales losses tied to the incident
If the fake is running as an ad, note where it sends people and what scam claim it makes.
How to organize the folder so a platform reviewer can follow it
Do not dump 83 random files into a cloud link.
Use a folder structure like this:
- 01_Official_Brand_Identity
- 02_Original_Content
- 03_First_Publication_Proof
- 04_Fake_Content_Evidence
- 05_Harm_and_Customer_Reports
- 06_Takedown_Submissions
Then add a short file called “READ_ME_FIRST.pdf” that explains the case in plain English.
Sample summary for that file
“We are the official owner of Brand X and the original publisher of the attached product video first posted on March 2, 2026. The account @BrandXDeals247 is using an altered version of that video with a synthetic voice to promote a fake discount site. Attached are our source files, original post links, screenshots of the fake, and customer complaints showing confusion and financial harm.”
That kind of summary helps a human reviewer connect the dots fast.
What to do the moment a fake goes live
Move in this order
- Capture evidence before it is deleted.
- Save URLs, ad IDs, account handles, and timestamps.
- Check where the fake sends users. Website, checkout page, messaging app, fake store.
- File platform reports with your proof folder ready.
- Warn customers on your real channels.
- Report payment processors, domain hosts, and ad networks if relevant.
The mistake many teams make is posting an angry warning first and gathering proof later. By then, the content may be gone, and your best evidence goes with it.
Where brands usually get stuck
“But the fake used my face, not my exact file”
That still matters. Deepfake scams often remix public interviews, livestream clips, podcasts, and social videos. Your folder should include clean examples of the real person, account links, and prior published clips to show what was manipulated.
“We do not have a trademark yet”
You can still report impersonation and fraud. Trademark helps, but it is not the only proof. Official site records, long-running account history, invoices for content creation, raw files, and customer communications all help.
“The fake is on multiple platforms”
Use one master incident folder, then create platform-specific subfolders for each report. Keep copies of ticket numbers and email replies. This stops your team from repeating the same work.
Build your proof folder before you need it
This is the part worth putting on the calendar.
Do a 30-minute setup this week
- Create the cloud folder
- Add your logo files and top 10 brand videos
- Save links to official channels
- Export a one-page identity sheet
- Assign one backup person access
Then do a monthly five-minute update
- Add new campaigns
- Save ad library references
- Update official handles
- Archive major product launches
That tiny routine can save days later.
At a Glance: Comparison
| Feature/Aspect | Details | Verdict |
|---|---|---|
| Proof folder readiness | Pre-saved source files, ownership records, and official links let you file a deepfake takedown for brands much faster. | Best first step |
| After-the-fact scrambling | Gathering screenshots, file history, and customer reports after a fake spreads wastes critical hours and weakens your case. | High risk |
| Customer warning plan | A prepared post, email, or pinned story helps limit scam damage while takedown requests are under review. | Strong backup move |
Conclusion
Deepfakes feel futuristic until they hit your inbox as a very ordinary mess. Angry customers. Fake discounts. Confused followers. Support tickets that seem to vanish into the void. The good news is that you do not need a giant legal team to respond better. You need a simple, repeatable evidence kit that proves what is yours and what was faked. That helps the community right now because platforms and regulators are tightening their response to synthetic media and non-consensual deepfakes, and those same systems are quietly shaping how fast brand owners can get impersonation and counterfeit content removed. Small businesses and creators are usually caught flat-footed, scrambling to gather proof after a fake goes viral, which burns time, money and trust. A proof folder gives you a calmer, faster way to act. Build it before you need it, and the next fake has a much smaller head start.